

This is a small webapp where you can see music categorized in different sections. Do you wanna know how I made this using simple React.Js. Lets begin...
This webapp is made with simple React.js. If you are a beginners in React or you are not aware with React so don't worry I am telling how to make this fro scratch. First of all you have to simply do a signup at CodeSandBox. Code Sand Box is a simple online editor to make your work more faster and user friendly.
After this just create your own sandbox for React and start coading as demonstrated in this blog.
- Step-1:- Your sandbox is ready with some piece of code written on it. If you are familiar with javascript you can understand that code easily. In sandbox our app.js file is connected with index.js and index.js is connected with index.html. So you can check it by making some changes to index.html (like- title, body, etc).
Now, open app.js file and start coding as demonstrated. So we are starting by creating a simple navbar.
<div className="App">
<nav class="navigation container">
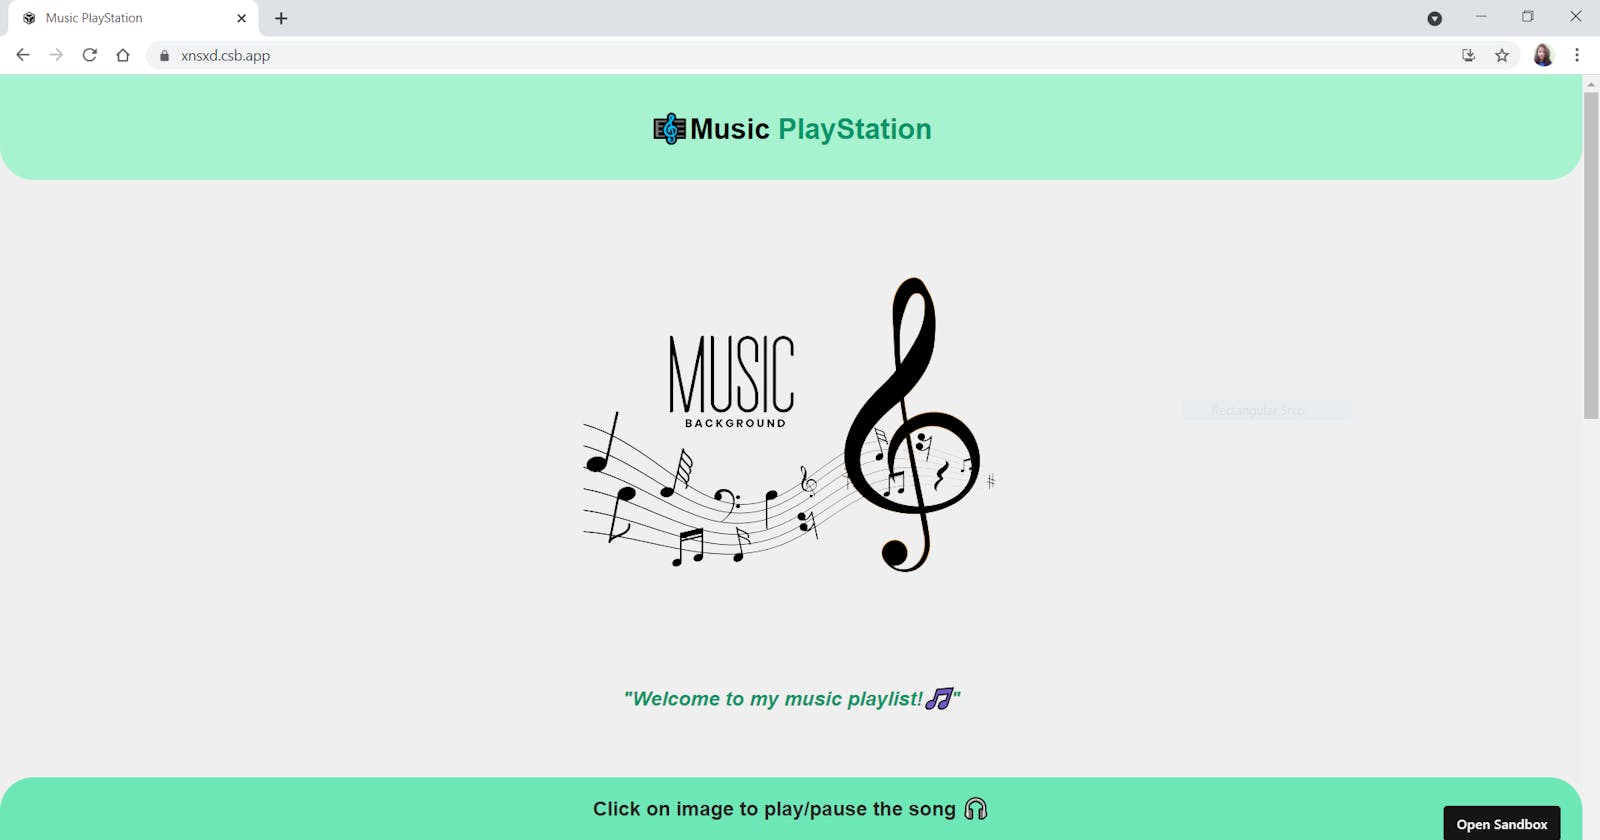
<div class="nav-brand">
🎼Music <span style={{ color: "#059669" }}>PlayStation</span>
</div>
</nav>
</div>
If you want to style this navbar you can add some CSS to if by writting code in style.css.
/* navbar */

.navigation {
  background-color: var(--primary-color);
  color: black;
  padding-top: 1rem;
  padding: 2rem;
  border-bottom-left-radius: 2rem;
  border-bottom-right-radius: 2rem;
}

.navigation .nav-brand {
  font-weight: bold;
  font-size: 1.7rem;
  text-align: center;
}
- Step-2:- After creating navbar we are moving to our next section which is for displaying the image.
Write this in you app.js file.
 <section class="one">
        <img src="/music1-removebg-preview.png" alt="" />
        <h2>"Welcome to my music playlist!🎵"</h2>
      </section>
To style this you can add this to your style.css file.
.one {
  padding: 1rem;
  text-align: center;
}

.one img {
  max-width: 400px;
  padding: 1rem;
}

.one h2 {
  color: var(--text-color);
  font-style: italic;
  padding: 1rem;
  font-size: 1.2rem;
}
Now here comes the main part how we are doing this. Clicking on button and displaying songs.
-Step-3:- So here we are using the concept of Array as an object were we are using a databse for storing songs and an array variable to store all the songs.
- Then on clicking the button we are mapping all the data and displaying the data which is matched.
- To create your database you can simply create a database.js file. Don't forget to import useState as well because we are going to use it now.
- Now your database file will look like this.
export const songsDatabase = {
  SoftSongs: [
    {
      image: "/perfect.jpg",
      name: "Perfect",
      singer: "by Ed Sheeran"
    },
}
This is not the whole database that I have used in this project this just a glimpse of it. You can create your own in this way.
Step-4:- Now creating array as an object and calling it.
- Take two variables for storing genre and songs.
  const [selectedGenre, setGenre] = useState("SoftSongs");
  const [selectedSongs, setSongs] = useState("Perfect");
- Now using the map function.
 <div className="btn_category">
            {songsDB.map((genre) => (
              <button
                onClick={() => genreClickHandler(genre)}
                style={{
                  cursor: "pointer",
                  background: "#E5E7EB",
                  borderRadius: "0.5rem",
                  padding: "0.5rem  1rem",
                  border: "1px solid black",
                  margin: "1rem 0.3rem"
                }}
              >
                {genre}
              </button>
            ))}
            <hr />
          </div>

          {songsDatabase[selectedGenre].map((song) => {
            return (
              <div className="place">
                <div className="card-image">
                  <img src={song.image} onClick={softSong} alt="place"></img>
                </div>
                <div className="card-info">
                  <h1 className="place-name">{song.name}</h1>
                </div>
                <div className="card-info1">
                  <h1>{song.singer}</h1>
                </div>
              </div>
            );
          })}
This is it. You can take a referrence from this code and can make your own webapp just like this one.
Link to my Music PlayStation project:- https://xnsxd.csb.app/
Thank You
#css #jreactjs #html5 #JavaScript